
Best Lights for Food Photography: A Restaurant Guide
Find the best lights for food photography in your restaurant. Our guide explains LED, natural light, CRI, and AI tools for stunning photos on a budget.
In this guide
- Table of Contents
- Why Your Food Photos Aren't Working
- The Three Elements of Perfect Food Lighting
- Direction decides whether food looks flat or edible
- Quality controls texture and shadow
- Color temperature sets the mood
- The fast way to judge any light
- Choosing Your Light Source for Food Photography
- Natural light is beautiful but unreliable
- Continuous LED lights fit restaurant reality
- Strobes are powerful but usually the wrong tool
- Simple Lighting Setups for Any Restaurant Space
- The one-light side setup
- The window setup when you have daylight
- The two-light setup for menu shoots
- Mastering Food Photography with Your Smartphone
- Use your phone like a camera, not a scanner
- The small habits that clean up phone shots fast
- The Modern Alternative Buying Lights vs Using AI
- When buying lights makes sense
- When AI is the smarter operational choice
- Quick Troubleshooting and Optimization Checklist
- Common problems and fast fixes
- The standard to aim for
You’ve probably done this already today. A plate leaves the pass looking great, you grab your phone, lean under the kitchen lights, take two quick photos, and then wonder why the burger looks flat, the pasta looks yellow, and the greens look tired.
That’s not a camera problem. It’s a lighting problem.
Most advice on the best lights for food photography assumes you have a quiet room, a tabletop studio, spare time, and enough patience to learn gear. Most restaurant owners have none of that. You’ve got a phone, a prep table, mixed lighting, and a few minutes before the next ticket lands. So this guide is built for real service conditions, not a hobby studio.
Table of Contents
- Why Your Food Photos Aren't Working
- The Three Elements of Perfect Food Lighting
- Choosing Your Light Source for Food Photography
- Simple Lighting Setups for Any Restaurant Space
- Mastering Food Photography with Your Smartphone
- The Modern Alternative Buying Lights vs Using AI
- Quick Troubleshooting and Optimization Checklist
Why Your Food Photos Aren't Working
The usual restaurant photo failure goes like this. Someone plates a new special, turns slightly toward the brightest part of the kitchen, snaps from above, and posts the least bad frame. On the phone screen it looks acceptable. On Uber Eats or Deliveroo it looks dull, greasy, or oddly gray.
That happens because overhead kitchen lighting is built for work, not appetite. It flattens texture, throws awkward shadows under garnishes, and shifts color in ways that make fresh food look older than it is. Even strong dishes lose shape when the light comes straight down or straight at them.
This is a widespread operational problem, not a personal failure. A 2023 hospitality tech report summarized by Two Loves Studio notes that 70% of independent restaurants struggle with consistent delivery app visuals due to ad-hoc smartphone photos in poor lighting, leading to 20-30% lower conversion rates by industry benchmarks.
Practical rule: If the dish looked better in person than it does in your photo, your light failed before your camera did.
The good news is that you don’t need to become a professional photographer to fix this. You need to control three things: where the light comes from, how soft it is, and whether it shows food colors accurately.
A lot of owners waste time tweaking filters, buying a newer phone, or adding props. Those things matter less than people think. Better light gives you gloss on a sauce, separation in a burger stack, texture in fried coating, and freshness in herbs. Bad light erases all of that.
There’s also a business reality most guides skip. You may not have a nice window. You may shoot at night. You may work from a food truck, a ghost kitchen, or a cramped back counter. That changes the real meaning of the best lights for food photography. For a restaurant, “best” doesn’t mean most advanced. It means fast, repeatable, forgiving, and easy enough for staff to use.
The Three Elements of Perfect Food Lighting
Good food lighting isn’t magic. It comes down to three elements you can judge quickly, even if you’ve never touched studio gear before: direction, quality, and color temperature.

Direction decides whether food looks flat or edible
Direction is where the light hits the plate from. For food, side light usually wins. Light from the left or right gives you shadow on one side and highlight on the other, which creates shape. That’s what makes a taco look layered instead of squashed, or a bowl of noodles look lifted instead of pasted together.
Front light is the usual mistake. It wipes out shadows and makes everything look flatter. Overhead light can work for a deliberate top-down shot, but in restaurants it often creates messy reflections and dark pockets.
If you remember one placement rule, use this one: put the light to the side of the food, not behind you.
Quality controls texture and shadow
Quality means whether the light is hard or soft. Hard light creates crisp shadows and stronger contrast. Soft light wraps around the food and gives gentler shadows. Most restaurant dishes look better with soft light because it’s more forgiving on glossy sauces, uneven plating, and reflective packaging.
Natural sunlight remains the benchmark because it reproduces color accurately across a full spectrum, but it needs diffusion to avoid harsh shadows. When you can’t rely on daylight, the most important spec on an artificial light is CRI, short for Color Rendering Index. A light with CRI 90+ is the baseline if you want food to look believable. According to SIRUI’s guide to choosing food photography lights, LEDs with CRI 95+ can reduce color distortion by up to 50%.
That matters more than many owners realize. Low-CRI lights are why red sauces can look muddy and greens can drift toward gray.
A soft modifier does more for food than raw brightness alone. If the light is bright but harsh, the photo still won’t look appetizing.
Color temperature sets the mood
Color temperature is measured in Kelvin. You don’t need to memorize the science. Just think of it as the warmth or coolness of the light.
Here’s the fast version:
- Cooler light around 5500K: Works well for cold dishes like salads, cakes, and lighter fare. It keeps the image feeling crisp and fresh.
- Warmer light around 3500-4000K: Works well for reddish foods like barbecue or hot pot. It adds warmth that supports appetite.
- Mixed room light: Usually causes trouble. If your LED is one color and your ceiling lights are another, the dish can pick up ugly color shifts.
A lot of restaurant photos fail because the owner shoots under mixed lighting and then tries to “fix it in editing.” That’s much harder than starting with the right color.
The fast way to judge any light
If you’re shopping or testing what you already have, use this checklist:
| What to check | What good looks like | Why it matters |
|---|---|---|
| Direction | Side-lit or slight back-side light | Builds depth and texture |
| Quality | Diffused, soft light | Avoids harsh shadows and glare |
| CRI | 90+, ideally higher | Keeps colors believable |
| Color temperature | Match the dish and kill mixed light | Prevents yellow, green, or gray casts |
If a light fails two of those four tests, it’s probably not worth building a workflow around.
Choosing Your Light Source for Food Photography
Not every light source fits restaurant life. The best lights for food photography in a studio aren’t always the best lights for food photography in a busy kitchen. The right choice depends on whether you need speed, consistency, and minimal learning curve, or whether you’re building a more formal content setup.
Natural light is beautiful but unreliable
Natural light is still the reference point. It’s flattering, full-spectrum, and often the easiest way to make food look honest and fresh. If you’ve got a big window and you can shoot at the same time of day, it can produce excellent results.
The problem is consistency. Clouds move. Service happens at night. Morning light looks different from noon light. Some spaces have no usable window at all. For a business that needs repeatable menu images, that unpredictability is a real limitation.
Natural light also needs shaping. If direct sun hits the plate, shadows get too harsh fast. You need a diffuser, a sheer curtain, or at least a piece of white material to soften it.
Continuous LED lights fit restaurant reality
For most owners, continuous LEDs are the practical winner. You turn them on and see the result immediately. That matters when you’re styling fries, adjusting sauce placement, or moving a drink by an inch. There’s no guessing.
According to Lume Cube’s food photography lighting guidance, LED constant lights are ideal for restaurant environments because of that real-time preview. High-output models can deliver 82,300 lux at 1 meter, and pairing LEDs with diffusers can minimize harsh shadows by 70%. The same guidance says CRI 90+ is essential if you want to avoid color distortion.
That doesn’t mean you need the biggest light on the market. It means you should buy the cleanest, easiest light you can manage, then soften it. A decent LED with a softbox or umbrella is more useful than a bare, brighter light that makes every plate look aggressive.
A restaurant-friendly LED setup usually has these traits:
- High CRI: Start at 90+
- Adjustable brightness: So you can work with a phone and different dishes
- Bi-color or stable daylight output: Helpful when your space changes
- Simple modifier support: Softbox, umbrella, or diffuser
Strobes are powerful but usually the wrong tool
Strobes and flashes are excellent in skilled hands. They’re powerful and can freeze motion cleanly. If you’re shooting a controlled ad campaign with an experienced photographer, they make sense.
For a restaurant owner doing quick menu updates, they’re usually more trouble than they’re worth. You can’t see the final lighting effect continuously. You need to understand triggers, flash behavior, and exposure interaction. That’s extra friction in an environment already short on time.
The best gear is the gear your team will still use on a Wednesday lunch rush. That’s why LEDs beat more technical setups in most restaurants.
Here’s the practical comparison:
| Light source | Best part | Main drawback | Best fit |
|---|---|---|---|
| Natural light | Beautiful, familiar look | Inconsistent by time and weather | Daytime shoots near windows |
| Continuous LED | Real-time preview, easy to learn | Requires space for stand and modifier | Most restaurants and phone shooters |
| Strobe | Strong output, pro-level control | More technical, less intuitive | Experienced photographers |
If you’re buying one physical system for your business, start with a continuous LED, not a flash.
Simple Lighting Setups for Any Restaurant Space
You don’t need a studio layout. You need a repeatable setup your staff can copy without asking questions. In most restaurants, one side light and one cheap reflector solve more problems than anything else.

The one-light side setup
This is the setup I’d recommend first to almost any operator.
Place a continuous light to the left or right of the dish. Keep it roughly at plate height or slightly above, angled across the food rather than straight at it. If you have a softbox, use it. If you don’t, use the light through diffusion material that’s safe for the gear you own. Then place a white reflector on the opposite side. Foam board works. A clean white menu can work in a pinch.
BeauPlat’s guide to photographing food lighting covers the same core principle. Side light creates shape. Fill from the opposite side stops the shadows from going dead.
According to Helio’s restaurant food photography lighting setup guide, high-power continuous COB lights of minimum 200W with a large softbox at a 60-90° side angle can create 20-30% more dimensional depth than flat front flash. Using a white reflector opposite the light fills shadows and creates a more natural look.
What this looks like in practice:
- Put the plate on a table away from overhead hotspots
- Kill nearby ceiling lights if you can
- Set your light to one side
- Diffuse it
- Add white bounce on the opposite side
- Move the dish, not just the camera, until texture appears
The window setup when you have daylight
If you have a good window, use it like a giant soft light. Put the food near the window, but not in direct sun. Place the camera so the window light comes from the side. Then add a white card on the shadow side.
This setup works especially well for pastries, salads, sandwiches, and plated brunch items. It tends to feel natural and less “lit.” The weakness is that you can’t rely on it every day, especially during service.
If your shadows are ugly, the light is usually too small, too direct, or too frontal. Fix those before you retake the shot.
The two-light setup for menu shoots
If you’re doing a proper seasonal menu refresh, add a second light only after the first one is working. The second light is not another main light. It’s a fill.
Use your key light from the side. Then place a weaker fill on the opposite side or slightly behind the food to open up shadows. Keep the fill softer and dimmer than the main light. If both lights are equally strong, the image loses shape again.
A few things work better than people expect in tight spaces:
- Large softboxes: Bigger light sources look gentler on food
- Umbrellas: Fast to set up, forgiving, and fine for many menu shots
- White reflector boards: Cheap and useful every single day
- Small rolling cart: Gives you a movable photo station without dedicating a room
What doesn’t work well in restaurants is front flash from the phone, bare bulbs aimed straight at the plate, or shooting under mixed overhead light and hoping editing will rescue it.
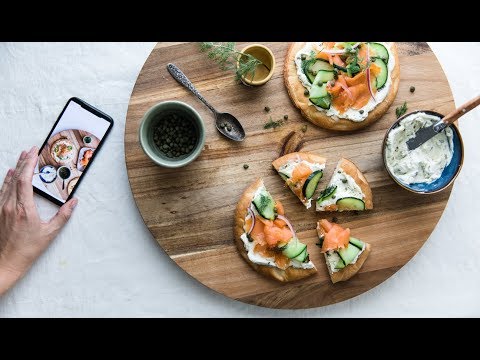
Mastering Food Photography with Your Smartphone
A modern phone is good enough for restaurant photography if the light is decent and you stop letting the phone make every decision for you.

Use your phone like a camera, not a scanner
The biggest upgrade most owners can make is learning to lock focus and exposure. Tap on the part of the dish that matters most, then adjust brightness before you shoot. On many phones, you can press and hold to lock focus and exposure, then slide to brighten or darken slightly.
That one habit changes the look of food photos fast. Instead of letting the phone average the whole scene, you tell it what matters. Sauce highlights stop blowing out. Dark plates stop dragging the whole image brighter than it should be. Texture stays visible.
BeauPlat’s article on food photography and lighting is worth reading if you want a practical companion to this workflow on a phone-first setup.
A few rules matter more than all the “secret camera settings” content online:
- Clean the lens: A smudged phone lens lowers contrast and makes highlights bloom
- Don’t use digital zoom: Move closer instead
- Stabilize the phone: A mini tripod or phone stand helps more than people expect
- Turn off the phone flash: It creates ugly, direct light
If your phone offers portrait mode, test it carefully. It can work for a hero dish, but it can also blur plate edges or garnish unnaturally. For menu consistency, the standard camera mode is often safer.
The small habits that clean up phone shots fast
Composition matters, but not in a precious, art-school way. Start with two dependable angles: straight on for burgers, stacked sandwiches, drinks, and layered desserts; three-quarter angle for bowls, pasta, and plated mains. Top-down works best when the dish has a graphic shape or multiple components arranged clearly.
Use the grid if your phone has it. Keep the plate level. Don’t crop too tight on the first shot. Give yourself room to trim later for delivery apps, menus, and social posts.
This walkthrough shows how phone capture and lighting choices work together in practice:
 Watch on YouTube
One more smartphone habit is worth keeping. Take three to five nearly identical frames, changing only tiny things: plate rotation, garnish position, camera height. Food often shifts from average to excellent with a very small adjustment.
The Modern Alternative Buying Lights vs Using AI
Physical lights solve a real problem. They also create a new one. Somebody has to buy them, store them, set them up, learn them, and use them consistently. That’s fine if you enjoy production work. It’s not fine if photos are one more task piled onto an already overloaded team.

When buying lights makes sense
Buy lights if you regularly shoot new menu items, have a spot to keep a small setup ready, and want more control at capture. A simple LED with a modifier can become part of your routine. If you’ve got one manager who cares about visual consistency and will use the kit, it can be a solid investment in process.
This route works best when your team can control a few conditions:
- A stable shooting corner
- Overhead lights that can be turned off
- Enough time to plate and reshoot
- Staff discipline to repeat the setup
If that sounds realistic, physical lighting is worth learning.
When AI is the smarter operational choice
A lot of operators don’t need more hardware. They need fewer steps between “dish is ready” and “image is usable.” That’s where AI tools can be a practical alternative. Instead of building a mini studio, you start with a decent smartphone shot and let software handle the lighting polish, consistency, and presentation.
This is especially useful for delivery-heavy brands, ghost kitchens, food trucks, and multi-location teams that need the same look across many items without training each location on lighting gear. In those businesses, speed and consistency matter more than mastering modifiers.
BeauPlat’s guide on how to take better food photos is a useful example of that operational mindset. The point isn’t to replace every photography workflow. The point is to remove friction when traditional setups are too slow or too technical.
The modern question isn’t just “What light should I buy?” It’s “Do I want to run a lighting setup at all?”
Here’s the honest trade-off:
| Option | Strength | Weakness | Best for |
|---|---|---|---|
| DIY lighting kit | More control at capture | Requires time, space, and consistency | Restaurants with repeat content needs |
| AI-enhanced workflow | Fast, scalable, low setup burden | Less hands-on control during capture | Busy operators and distributed teams |
If your current bottleneck is not image quality alone but the fact that nobody has time to produce images properly, AI is no longer a gimmick. It’s a workflow decision.
Quick Troubleshooting and Optimization Checklist
Keep this part handy during your next shoot.
Common problems and fast fixes
Food looks flat
Fix: Move the light to the side. Flat photos usually come from front or overhead light.Shadows are too dark
Fix: Add a white reflector opposite the light. Even a simple foam board helps.Colors look wrong
Fix: Use a light with CRI 90+ and avoid mixed room lighting.Sauces and glossy toppings have bad glare
Fix: Raise or shift the light angle and make the light softer.Phone photos look hazy
Fix: Clean the lens first, then retake the shot.The dish looks different every time
Fix: Use one repeatable setup in the same spot instead of shooting anywhere there’s space.The image feels cold or unappetizing
Fix: Match the light color to the dish. Cooler for fresh, lighter foods. Warmer for rich, reddish dishes.
The standard to aim for
Use soft side light, accurate color, and one repeatable workflow your team can manage. That’s the shortest path to better food photos.
If you want restaurant-ready images without building a lighting rig, BeauPlat gives you a faster path. You can snap or upload a smartphone photo, apply lighting and ambiance that fit your brand, and turn ordinary dish shots into high-definition visuals built for menus, websites, and delivery platforms. It’s a practical option for operators who need consistency but don’t have time to become photographers.
Take action
More desirable visuals, without repeat photo shoots
BeauPlat helps restaurants keep a visually consistent menu, publish faster, and convert better on delivery platforms and their own site.
More in this category

10 Best Apps for Restaurant Owners in 2026
Discover the best apps for restaurant owners in 2026. A deep dive into POS, labor, inventory, marketing, and photo tools to boost profit and efficiency.

10 Best Marketing Strategies for Restaurants in 2026
Discover the 10 best marketing strategies for restaurants in 2026. Boost orders with high-quality photography, local SEO, social media, and more.

AI Food Image Generator: A Restaurant Guide for 2026
Learn how an AI food image generator can boost your restaurant's sales. This guide covers use cases, best practices, ROI, and legal risks for food businesses.

10 Low Cost Marketing Ideas for Restaurants in 2026
Boost sales with these 10 low cost marketing ideas for restaurants. Get actionable tips on social media, local SEO, and partnerships to grow your business.

Best Food Delivery App for Restaurants: 2026 Guide
Discover the best food delivery app for restaurants in 2026. Compare top platforms to boost your orders, manage logistics, and increase your profit margins.

8 Restaurant Food Photography Tips to Boost Sales
Master your menu visuals with our top restaurant food photography tips. Learn lighting, styling, and platform optimization to boost delivery app sales.